Beastlord Epic
| Start Zone: | Shar Vahl |
|---|---|
| Quest Giver: | Historian Sharar |
| Recommended Level: | 46+ |
| Classes: | Beastlord |
| Related Zones: | Various |
| Related NPCs: | Various |
Introductions[edit]
[ ] Begin the quest by talking to Historian Sharar in the Shar Vahl Library. Receive the Historian's Book.
[ ] Find Elder Animist Dumul in the Beastlord guild. Give him the book.
[ ] Obtain any Medal of War from Grimling Forest raids.
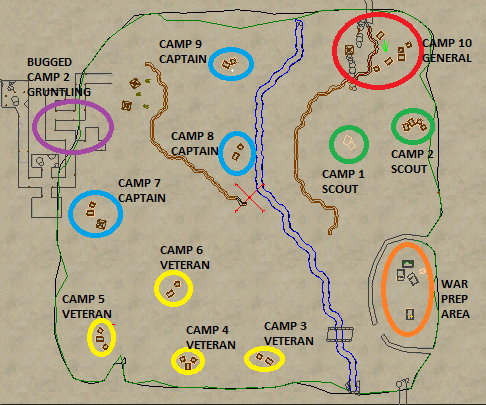
[ ] Buy a Polished Acrylia Sphere from Shopkeeper Chirrin at war prep area. (loc -487, -1160).
[ ] Hand Polished Acrylia Sphere to Scout Husman at war prep area (Loc -858,-1161).
[ ] Don't wait for Scout Hussman run immediately west across bridge toward two hut grimling camp. Clear all mobs in camp until Scout Hussman arrives. (Veteran Camp 3; Loc -1198,-113 ).
[ ] Use sit aggro during each wave of spawns. Protect Scout Husman by killing all mobs until eventually at a random wave kill a Grimling Officer (approximate time 20-45 minutes).
[ ] Loot Grimling Officer’s Scalp and give scalp to Scout Husman once all mobs in camp are dead.
[ ]Receive a Medal of War.
[ ] Give the Medal of War to Elder Animist Dumul to obtain the Official Seal of the Khati Sha and Carved Wooden Chest. If you lose your seal from a failed spirit fight simply hail Dumel and say "I have lost my seal may I have another".
Scouts and Spirits[edit]
Spawned spirits hit for 225 max and are unslowable. All have approximately 32k HP. All except the Spirit of Rage flee at low life. They can be done in any order.
Scout Jaromin (Permafrost)
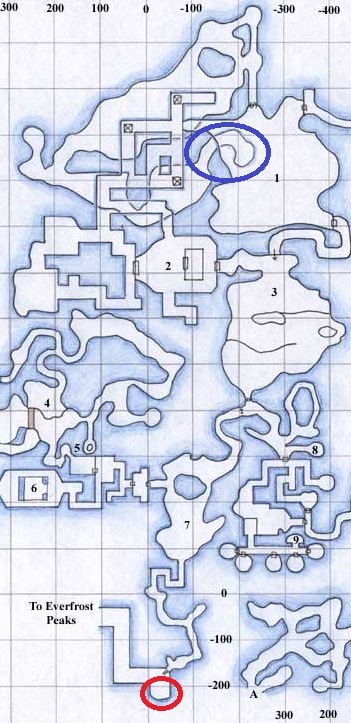
[ ] Give the Seal to Scout Jaromin (Loc -218, -15) to spawn the Icebound Spirit. He is found near the zone in, behind rocks near the first ladder up to the goblin caves. Kill the Icebound Spirit and loot the Totem. You have a short window to clear to the spirit before it despawns, and once you pass the portcullis to the giant area you cannot return. It is suggested you clear the giants, who have a longer respawn, before turning in seal. When killing the spirit setup on the ice ramp before the flat fake floor (Loc +897, -47). Healers can heal on the ramp and the Beastlord can drop through the fake floor just east of the ramp on the flat part. Beastlords and druids are not kos in the pit. It is suggested to keep all other characters on the ramp above the pit to avoid adds. As soon as you drop down the spirit will aggro you.
- Slow attack speed
- Flurries
- Low MR, High CR
- Icy Claws: 400 DD proc. Easily resistable at >150 CR.
- Spawns in the pit. Flees at low life and if allowed to run far will path into a wall and warp. Burst damage or stuns recommended to control the flee at 15%. Note that Beastlords, Druids, and possibly Rangers are not KoS to the bears in the pit so they do not need to be all cleared to reach the Icebound Spirit who spawns in the very back of the pit.
- Another common strategy is to bring a group with a Magician, and Wizard or Druid. Leave the Beastlord at Scout Jaromin, while the group moves to the back cubby of the bear pit. Have the group kill the bears, then the Beastlord turn in the seal near zoneline and recieve CotH. You can avoid agro from the spirit, on spawn, by breaking line of site in the cubby. Respawns are likely by the time the spirit dies, loot quickly and evac back to Scout Jaromin.
[ ] Give the Totem to Jaromin and receive the Wrapped Ice Bear Totem and another Seal.
Rahjiq (Lesser Faydark)
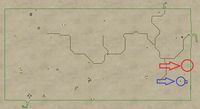
[ ] Hand the Seal to Scout Rahjiq (loc +191, -1893) to spawn the Spirit of Malevolence. Kill the Spirit and loot the Totem. Turn it in to Scout Rahjiq for the Wrapped Wolf Totem and another Seal.
- High MR and PR
- No Combat Abilities
- Enveloping Fog: Blindness proc. Easily resistable at >150MR.
[ ] Give the Totem to Rahjiq and receive the Wrapped Wolf Totem and another Seal.
Ahlikal ( Feerrott)
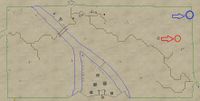
[ ] Give the Seal to Scout Ahlikal to spawn the Spirit of Decay. Kill the Spirit and loot the Totem. Turn it in to Scout Ahlikal for the Wrapped Spider Totem and another Seal.
- High MR and PR
- No Combat Abilities
- Poisoned Web: AE Poison DoT and snare. Resistable at >150PR.
[ ] Give the Totem to Ahlikal and receive the Wrapped SPider Totem and another Seal.
Eyru (Swamp of no Hope)
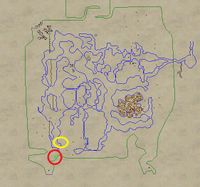
[ ] Hand Scout Eyru the Seal to spawn the Spirit of Sorrow. Kill the Spirit and loot the Totem. Turn it in to Scout Eyru for the Wrapped Alligator Totem and another Seal.
- High CR
- No Combat Abilities
- Death Roll: AE spin stun. Suggested all characters have >150MR as the AE goes off frequently. Lower level characters, pets, and low MR characters will be almost useless.
[ ] Give the Toem to Eyru and receive the Wrapped Alligator Totem and another Seal.
Malom (Stonebrunt Mountains)
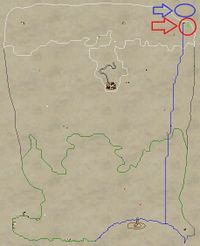
[ ] Give the Seal to Scout Malom to spawn the Spirit of Torment. Climb the wall next to the waterfall, kill the Spirit and loot the Totem. Turn it in to Scout Malom for the Wrapped Watcher Totem and another Seal.
- Slow attack speed, no combat abilities.
- Striking Vertigo: Strong 2 slot dispell and knockback. Plan for your tank to be fully dispelled while tanking.
[ ] Give the Totem to Malom and receive the Wrapped Totem of the Watcher and another Seal.
Vyrak (Emerald Jungle)
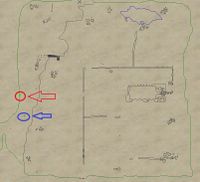
[ ] Give the Seal to Scout Vyrak (loc +238, +4212) to spawn the Spirit of Rage. Kill the Spirit and loot the Totem. Turn it in to Scout Vyrak for the Wrapped Gorilla Totem and another Seal.
- Low resists
- Flurries
- Savage Roar: AE fear. Suggested all characters have >150 MR.
[ ] Give the Totem to Vyrak and receive the Wrapped Gorilla Totem and another Seal.
[ ] Combine all 6 Wrapped Totems to create a Sealed Box of Totems. Turn this in to Elder Animist Dumul. Receive the Seal of Elder Dumul.
Draz Nurakk[edit]
[ ] Find Scout Sihmoj in Timorous Deep, hand him Dumul's Seal to spawn Draz Nurakk and receive a Black Silk Sack. Note that you will not be given the Seal of Elder Dumul back and failure here will require you restart the quest line. If you have a Wizard or Druid, Evac/Succor once in TD will take you to the island just north of the scout.
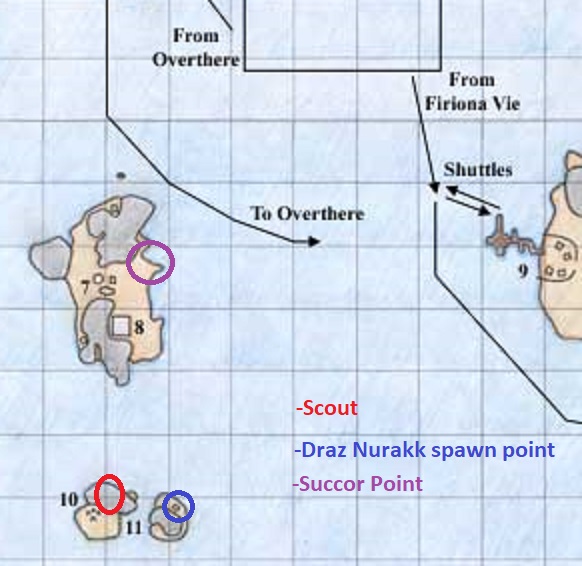
[ ] Kill Draz in the small hut to spawn 6 Images of Draz Nurakk. Kill each one, collect 6 Shards of Broken Glass and combine in the bag.
- The initial spawn and 5 of the 6 images hit for 170. One of the images is slightly higher level and hits for slightly more. All have approximately 10k HP. Each of the 6 images are immune to some spell type (attack speed changes, run speed changes, etc). They cast beastlord spells up to their level.
- Level 60 characters are able to single pull the Images.
- Suggested overkill here to prevent loss of quest progress.
[ ] Give the combined bag, Sack of Broken Glass, to Sihmoj, he returns an alternate ID of the same sack.
[ ] Give the bag to Elder Animist Dumul and receive Note for Historian Qua.
[ ] Hail and give the Note to Arms Historian Qua in Shar Vahl, receive Quas Receipt [sic].
[ ] Hail Weapons Master Rahoul and give him the receipt, receive Rahoul's Collection Box.
Collect and combine in the box:
- Perfect Acrylia Ore from assorted stonegrabber mobs in the Grey, spawned from trap. Traps take 20 minutes (same as zone respawn timer) to rearm. Traps can spawn 5 different mobs, but only drop off of a boulder field, stone beast, Boulder, and Stonehand. You can use invis to trigger the trap, and avoid agro. Trap Mobs will despawn if not engaged. You can do a rotation of traps starting at Scarlet Desert Zoneline to the lake in the NE (Loc: -35,-1566, +1097,-1691, +1466,200, +1601,+1327).
- 2x Gem of the Void from Xi Xaui and Xi Vius in The Maiden's Eye. Since only Black robe mobs spawn in the north east of the zone best on eastern wall just north of Umbral Plains at (loc +1000, -1600)
- Chunk of Dense Fungal Padding from any shrieker mob in The Deep including the ones at the zoneline.
[ ] Give the Sealed Collection Box of combined items to Rahoul, receive Jagged Claw of Rending Primary and Secondary.
[ ] Give the two claws to Dumul, receive the 2 claws back, the Khati Sha Seal of War and an Acrylia Gilded Box.
[ ] Locate Scout Halmia in Fungus Grove. Give her the Seal from Dumul to spawn Draz Nurakk and a leashed warder. She will return a different version of the Seal for use later
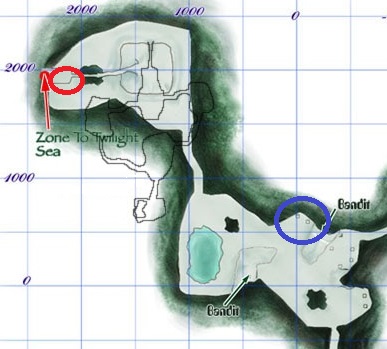
[ ] Kill Draz, loot his head.
- Draz and his warder hit for about 170. He will cast beastlord spells up to his level. His warder is melee only.
- The Iksar has around 32k HP and flees at low life. His warder has significantly less HP and does not flee. Draz will not flee if his warder is still alive and engaged.
- He has moderate resists but is slowable. Both him and his warder are immune to runspeed changes and mez.
- Draz can only be damaged in melee by bane weapons (i.e. your two Jagged Claws). As you will typically want to leave his warder alive until he is dead, melee DPS characters and melee pets are nearly worthless. It is suggested to have solid caster DPS for this fight.
- Draz Nurakk also has a number of items on his loot table. Only the head is required for completion of the quest.
[ ] Combine the Draz Nurakk's Head, The Jagged Claws and the Khati Sha Seal of War from the scout in the box.
[ ] Give the Sealed Acrylia Gilded Box to Elder Animist Dumul and receive the Claws of the Savage Spirit!
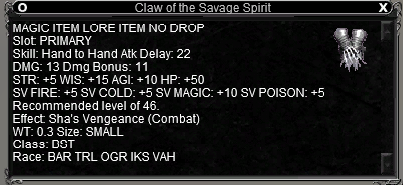
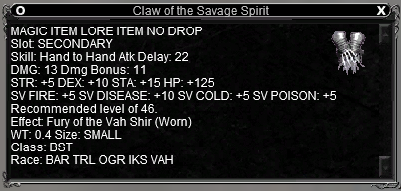
Main Hand Proc: Sha's Vengeance: 55% slow and 23pt DoT for 2 minutes
Off Hand passive: Fury of the Vah Shir: 40% haste, 30 ATK
Credit to Zikkar of FV server for checklist and eqprogression.org for map pictures.